Olympus FL50 User Manual
Browse online or download User Manual for Flashlights Olympus FL50. Olympus FL50 User Manual
- Page / 17
- Table of contents
- BOOKMARKS
Summary of Contents
Fantasea FFL 50 Flash Housing for the Olympus FL50 Flash 1
OPENING LEVERS After unscrewing and pulling out the pressure release plug, the lid can be opened. To overcome the friction of opening, two levers ar
MOUNTING THE SPEEDLIGHT IN THE HOUSING INSERTING Since the Fantasea FFL 50 Flash Housing was specifically designed for the Olympus FL50 Speedlight,
FIGURE 4: REPLACE THE LID CLOSE HOUSING 1. Place housing back over front and align the complete mating surface of the housing and the gasket, formin
13 ATTACHING THE SYNC CORD The sync cord is a 5 pin Nikonos type sync cord. The sync cord connects the flash to the camera housing. Both ends of the
ATTACHING FLASH HOUSING TO ARM You can either use the Fantasea Flex or Ball and Joint Arms to attach the flash housing to the camera housing. Other
15 BATTERY LIFE The Ni Cad and alkaline batteries used with the flash are very efficient and usually last for more than one typical photo dive. It i
16 TRAVELING When transporting by air, please ensure the housing is not sealed to allow the air pressure to equalize; removing the gasket is recomme
17 WARRANTY FANTASEA HOUSINGS ONE YEAR CONSUMER LIMITED WARRANTY In order to receive warranty service register your Fantasea Housing you must present
2 TABLE OF CONTENTS TABLE OF CONTENTS ...
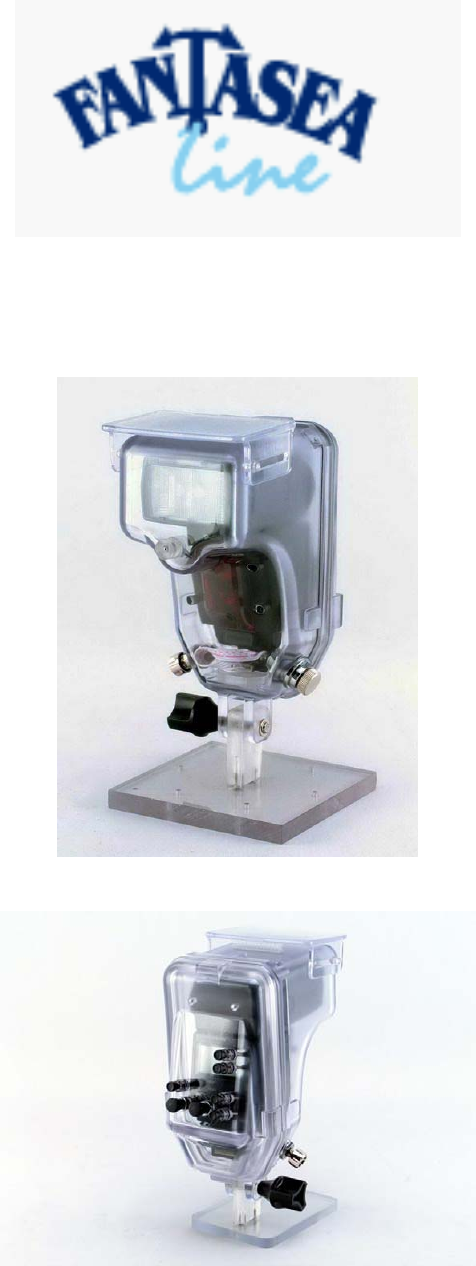
3 GENERAL INFORMATION FANTASEA FFL 50 FLASH HOUSING Specifically designed housing for the Olympus FL50 Speedlight. The FFL 50 provides full controls
4 FEATURES AND ACCESSORIES INCLUDED WITH THE HOUSING FEATURES: • Visible main gasket seal for final pre-dive check • Double O-ring design on all co
FUNCTION CONTROLS 1. Mode To select the flash control mode and is shown on the control panel. 2. Zoom This is to adjust the firing angle. 3. Test
6 MAINTENANCE OF THE MAIN GASKET SEAL Each housing is individually inspected and hydrostatically tested in the factory. The design of the main gasket
When to Maintain the Gasket Seal: Remove the gasket periodically for inspection. It is not necessary to remove, clean and re-install the gasket afte
8 3. Clean the seal recess (the square groove where the gasket sits) with a cotton bud. 4. Inspect the gasket all the way round its surface for dam
EXCLUSIVE PRESSURE RELEASE PLUG The body and lid are uniquely designed with a "no clip" closure arrangement. Our testing has shown that th
Related products and manuals for Flashlights Olympus FL50
 (60 pages)
(33 pages)
(18 pages)
(25 pages)
(3 pages)
(60 pages)
(33 pages)
(18 pages)
(25 pages)
(3 pages)
 (56 pages)


 (186 pages)
 (162 pages)
(56 pages)
(162 pages)
(162 pages)
(56 pages)
© 2020, manymanuals.com. All rights reserved. | 0.498 s |
 Manymanuals.com
 Manymanuals.de
 Manymanuals.fr
 Manymanuals.it
 Manymanuals.pl
 Manymanuals.cz
 Manymanuals.es
 Manymanuals-pt.com
Comments to this Manuals